Motion
micro:bit – How to make an inchworm robot
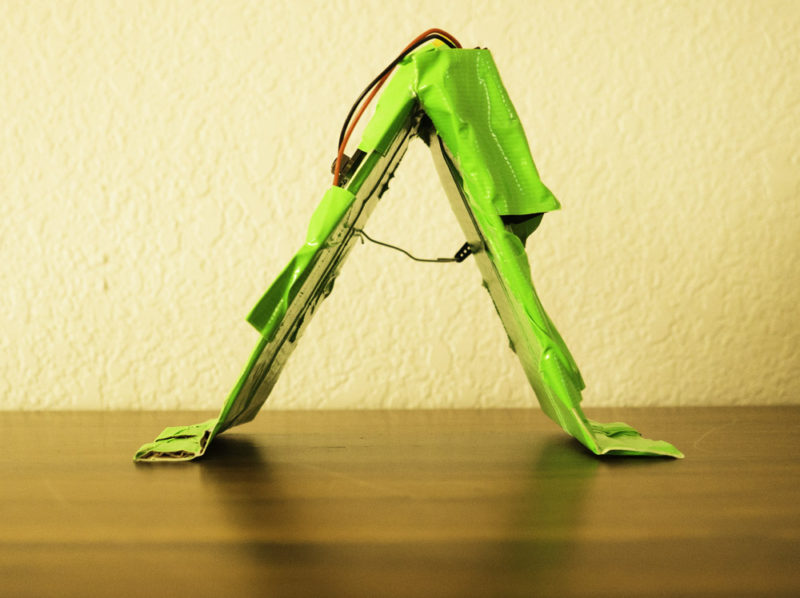 This inchworm is a fun starter project for anyone interested in learning about robotics but they don’t know where to start. It is a simplified version of the Inchworm robot design found on the MakeCode for micro:bit site.
Directions
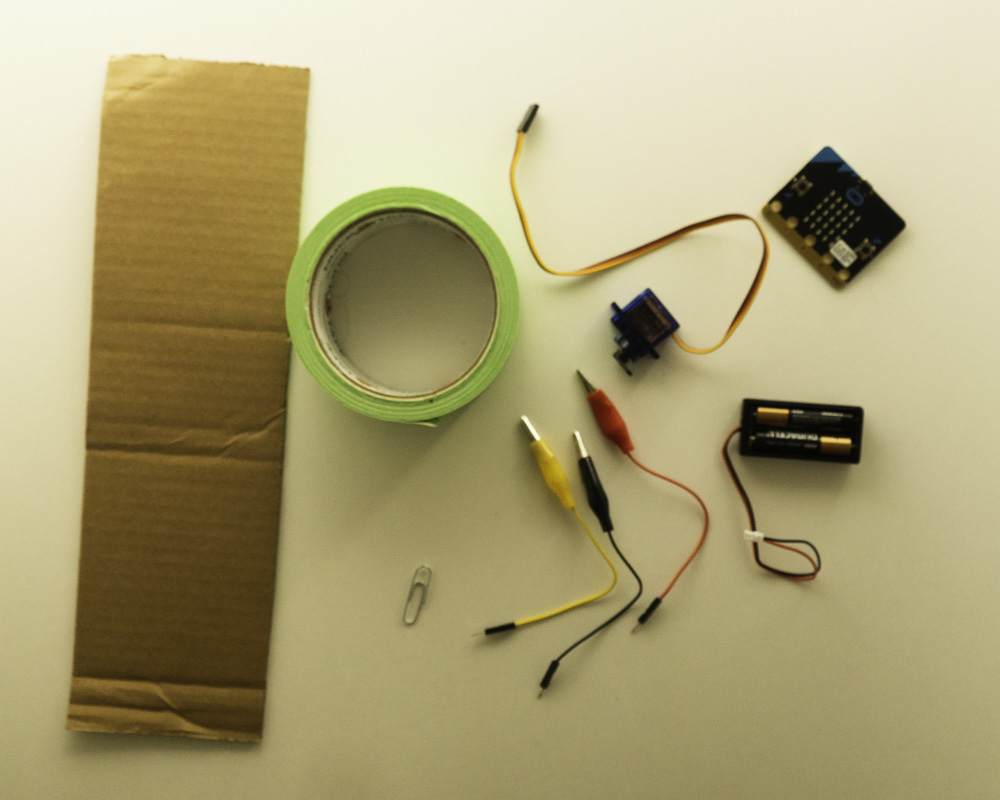
Electronic Parts
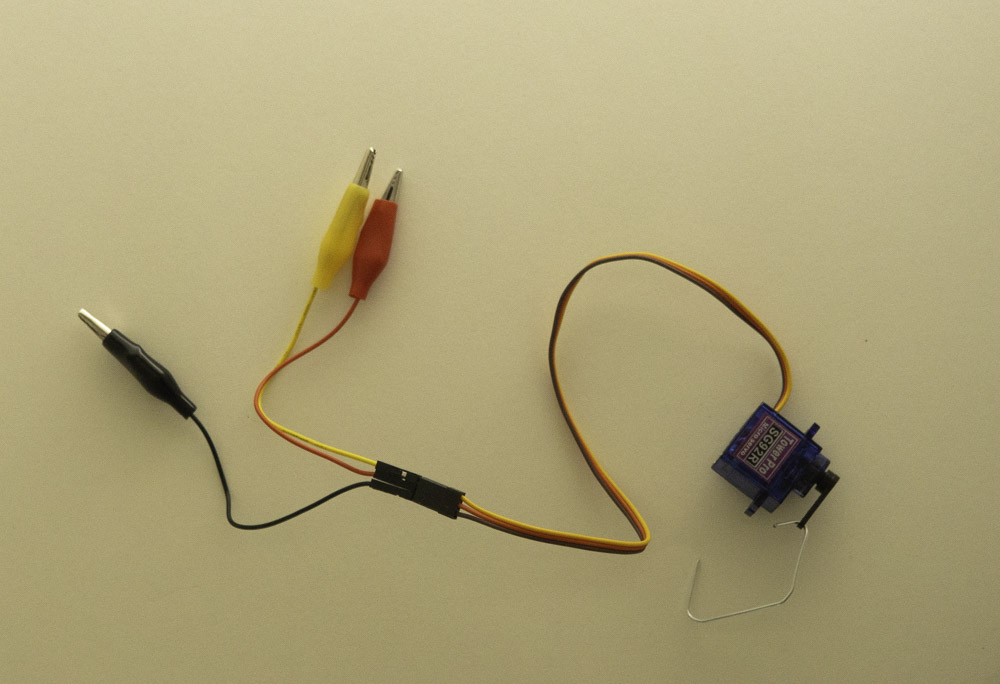
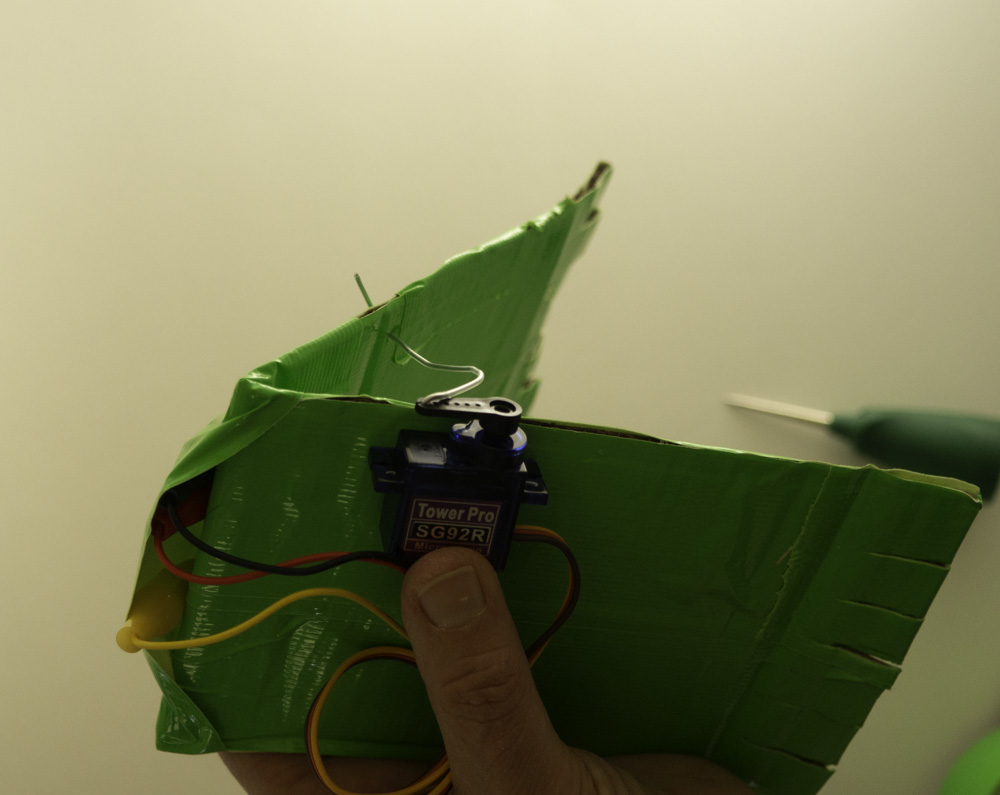
- Servo motor – I used a TowerPro SG92R. This is the new version of the SG90 that was used in the original directions. Note that servo motors come attachments that are called horns. These are arms that you can use to attach the servo to things like wheels. You will use the single arm horn for this project. It has predrilled holes but you may have to enlarge the hole to fit the paper clip through it. I used an awl to enlarge the hole.
- Alligator clips with male connectors – These are used to connect the servo motor to the micro:bit.
- micro:bit – This is the microcontroller that we will use to control the servo
Other Parts and Supplies
- Cardboard – You need a rectangle that is at least 12″ x 3.5″ to fit the parts.
- Small paper clip – This is used to attach the servo to the cardboard frame.
- Duck Tape – I chose green.
- Scissors
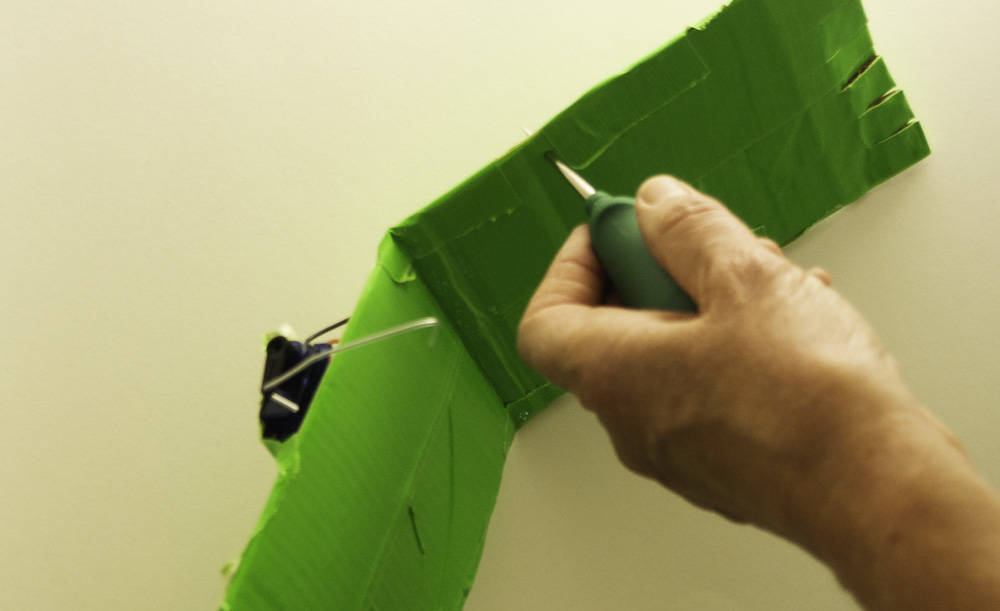
- Awl – You will use this to put a hole in the cardboard to attach the paperclip. You will also use it if you need to enlarge the hole on the servo horn.
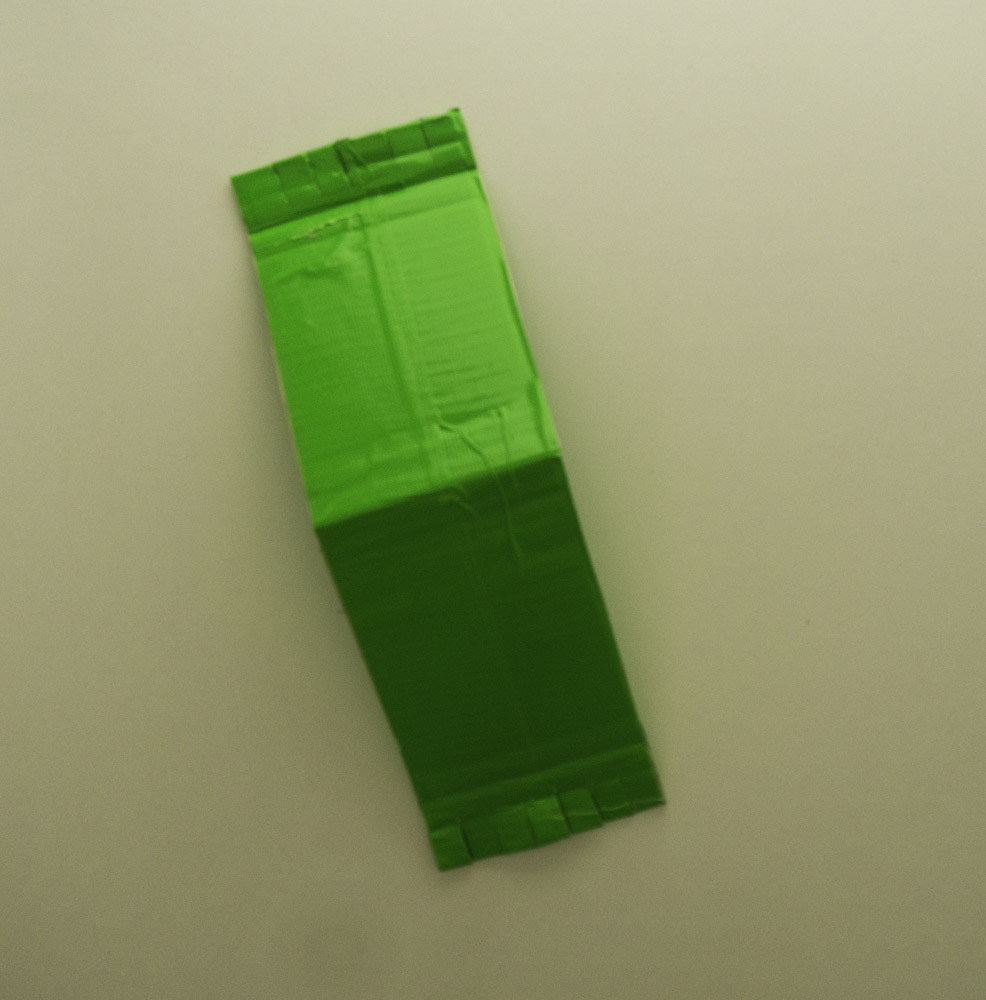
Step 1: Shape and Decorate the Cardboard
- Cut a rectangle from the cardboard that is about 12″ x 3.5″
- Cover it completely in your choice of Duck Tape
- Fold it in the middle, the fold each end about an inch in
- Cut the ends vertically every half inch or so. Cut up to the folds
Step 2: Attach the servo to the micro:bit and program the micro:bit.
- Go to makecode.com and click on micro:bit. This will open a new window
- Select ‘New Project’. This will open a new window where you can write your code.
- Name your program by typing the name in the ‘Untitled’ box.
- Add the following code:
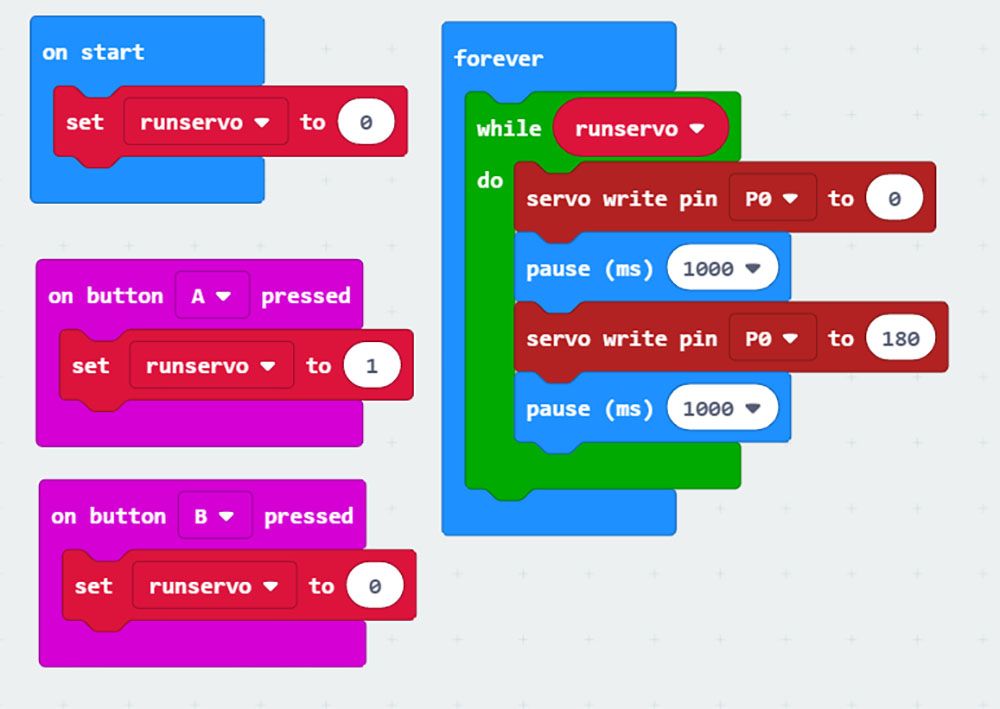
- Once you have the code in, you will see that the virtual micro:bit on the left side of the screen has a servo attached. You will want to attach yours to match, connecting the male end of the alligator clips to the female connections on the servo.
- Download the code to your microbit by doing the following:
- Make sure the micro:bit is connected to your screen using the microUSB to USB cable.
- Click ‘Download’ in the lower left corner of the window.
- When the ‘Save as’ window opens, make sure that the micro:bit it selected and download. The yellow LED next to the microUSB will blink while the program is loading. Once it is done, close any extra windows that opened.
- Test the code by pressing the A button. The servo arm should go back and forth. Press the B button and it should turn off. If this isn’t how it works, double check your code. You may need to change it and reload it.
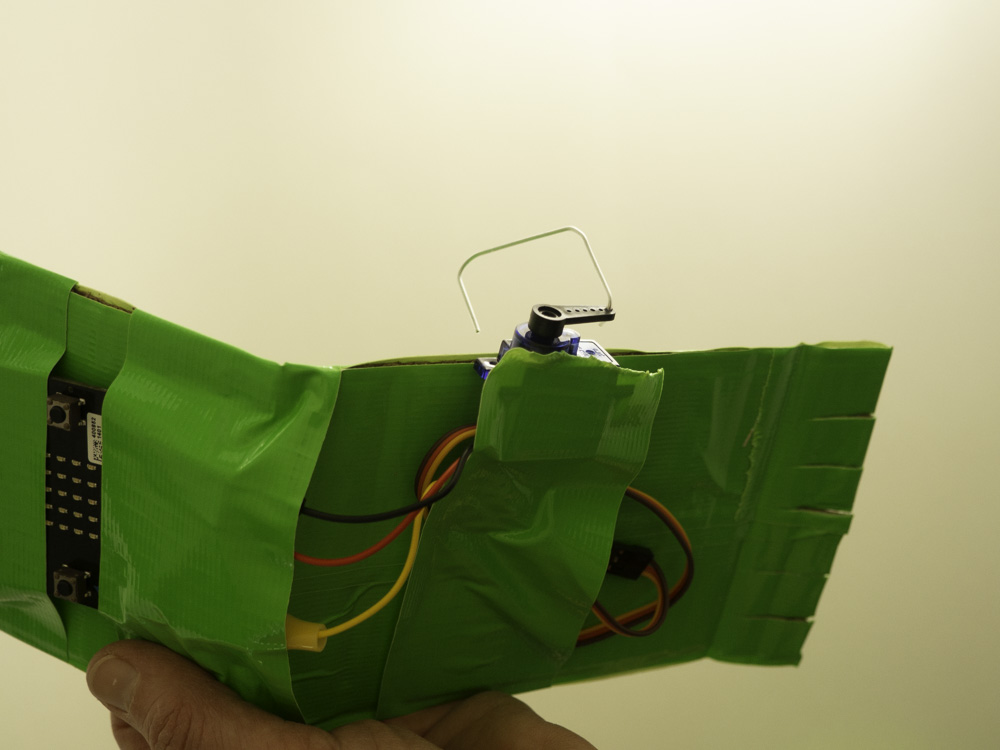
Step 3: Attach the paperclip to the servo
- Bend the paperclip open.
- Place the single-arm horn on the shaft.
- Push one end of the paperclip through the farthest hole on the horn. If the paperclip won’t go through it, use the awl to make the hole a little bigger. Bend the end of the paperclip back on itself to hold it in place.
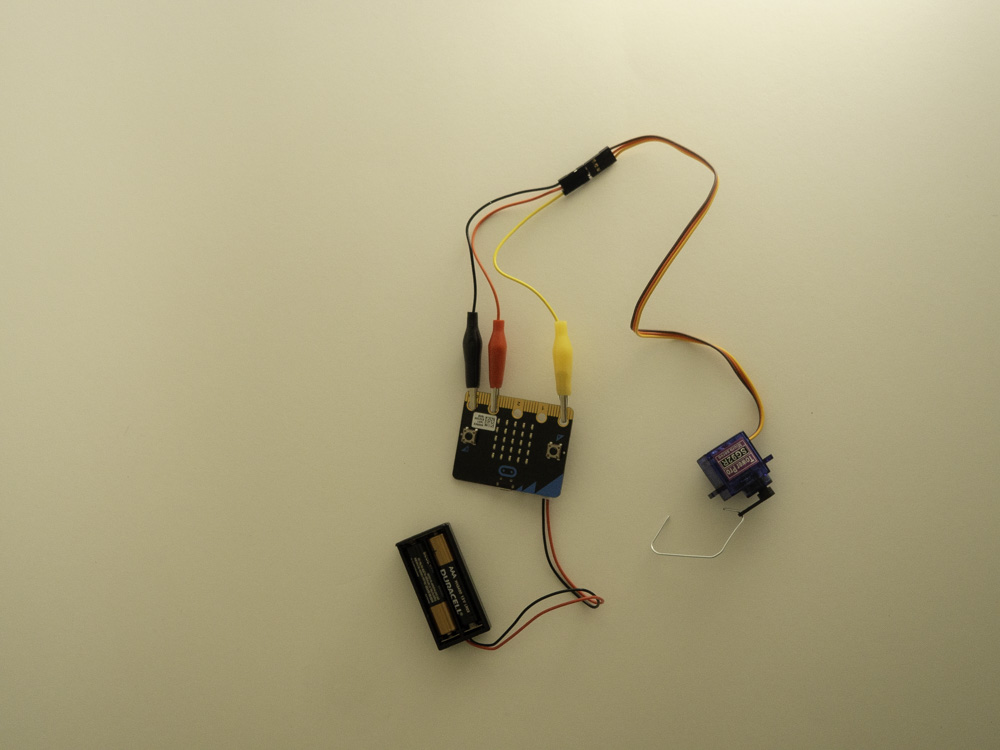
- Attach the alligator clips to the servo by placing the male ends on the alligator clips into the female ends on the servo. Note that the color of the wires on your alligator clips may not match the colors on the servo, but this doesn’t matter; just make sure that the servo wires are attached to the micro:bit using the alligator clips as follows (this is shown on the virtual micro:bit as well):
- Black goes to gnd
- Orange goes to 3v
- Yellow goes to 0
- Test the micro:bit by pressing the A button. If the servo doesn’t turn back and forth, check your code, make corrections, and resave it to the mico:bit. Test again.
Step 4: Attach the parts to the cardboard
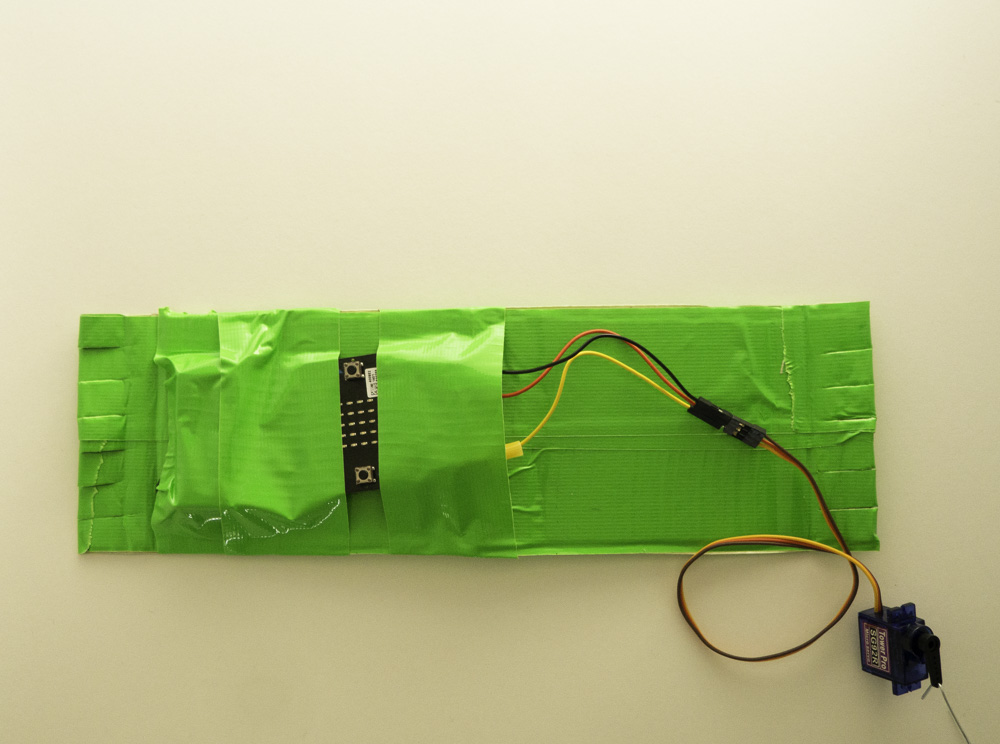
- Place the inchworm more or less flat on a table.
- Place the battery pack on the bottom left side of the inchworm a little above the leg fold
- Tape it in place
- Place the microbit above the battery and below the top fold, alligator clips pointed toward the top; tape it in place. Be careful to leave the LED array and the A and B buttons uncovered.
- Tape the servo in place about midway down the right side of the inchworm, making sure that the arm is hanging far enough over the edge to turn easily.
Step 5: Attach paper clip to the other side of the triangle
- Use an awl or other sharp object to poke a hole opposite the servo.
- Push the end of the paperclip through the hole, then bend it to secure it.
- Test the Inchworm.