Motion
How to Make a Buzzing Bee
Here is an easy and fun way to make a buzzing bee. This bee is a variation of the “Pipe Cleaner Bugs” found on page 16 of the book Usborne Activities 365 Things to Make and Do. I have added a vibration motor to the bottom of the bug to make it have some bee-like behavior. Use it as an activity to teach kids about circuitry while they also learn about ecosystems.
The ingredients you will need to make the bee are:
- Corrugated cardboard. You can just use old boxes for this. If you want to get thinner cardboard because it’s easier to cut, try to find packaging inserts. They are very thin but still corrugated. If you want, you can buy a pack of them.
- Yellow acrylic paint
- Black acrylic paint or markers. I used Sharpies. They are permanent markers, but they cover the yellow paint really well.
- Black pipe cleaners
- White vellum or other paper you want to use for the wings
- A vibrating motor. You will need one vibrating motor per bee.
- One 1.5V battery (e.g. AG13 or LR44). You can also use a 3V coin cell battery (e.g. CR2032).The coin cell battery will make the bee’s buzz stronger.
- School glue
- Glue dots or double-sided clear tape to attach the wings. Note: If you use a paper type that is not vellum for the wings, you may be able to get by with school glue to secure them.
Here are the directions:
- Print the template for the bee and wings which is located here, and cut out the pieces.
- Trace the bee onto the cardboard and the two sets of wings onto the vellum. Cut them all out. Note: If you are doing this project with younger kids, you might want to help them cut the corrugated cardboard.
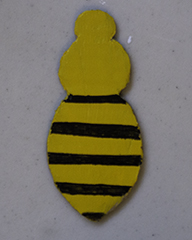
- Paint one side of the bee yellow, then let it dry completely.
- Paint or draw the black stripes. I drew mine with a Sharpie.
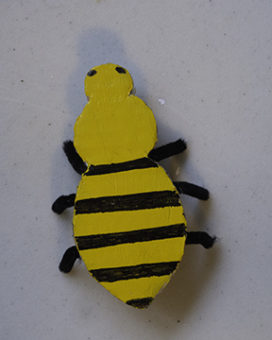
- To make the legs, cut 6 1.5 inch pieces of pipe cleaner. Put a little bit of glue on one end of each piece of pipe cleaner and push them into the holes in the cardboard at appropriate insect-intervals. Let the glue dry then bend the pipe cleaner pieces to shape the legs.
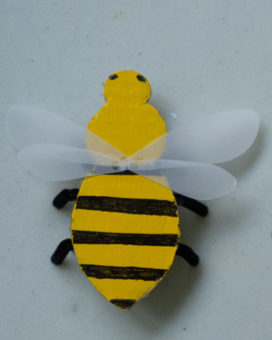
- Attach the wings, small wing below the big wing, using glue dots or double-sided clear tape.
- Turn the bee on its back. Attach the buzzing motor to the midsection of the bee. The motor may have an adhesive side. If it doesn’t, use a glue dot or double-sided clear tap to secure it.
- Tape the black, or negative, wire down and leave the red(positive side loose.
- Place the battery, negative side down, on the black wire. Make sure the metal of the wire is touching the metal of the battery. You can secure the battery with a glue dot or tape, but don’t let it interfere with the metal connection.
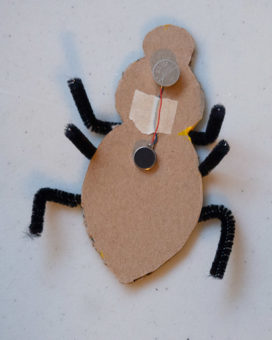
- To make the bee buzz, place the red wire on top of the battery, making sure the metal of the wire connects with the metal on the positive side of the battery only. This should make it buzz. Tape it in place and turn the bee over. You’re finished!